
NODE ATOM
Installation / Setup Guide
The video below gives you instructions for unboxing your ATOM 650 loudspeakers
Welcome and thank you for being part of the NODE experience.
We are excited to have you on board and to ensure you get the best from our product we suggest you follow this guide.
ATOM are an extraordinary unique design – this setup guide explains how to best to handle your speakers and gives you a starting point for how to position them to get optimum performance.
Handling and removing your speakers from its packaging:
1. Lower plastic handles out of the way and then open cardboard box (taking great care when opening)
2. Remove accessory box. Remove all jewellery and wear gloves provided for handling
3. Remove supportive foam and card inserts.
4. ATOM 650 requires a 2 person lift for safe removal. Person ‘A’ places one hander under the base of the speaker and the other hand supporting underneath. DO NOT lift by the terminals.
5. Person ‘B’ places one hand under the top of the speaker, lifting under the speaker with the second hand.
6. Lift ATOM 650, ensuring foam inserts are left in the box. GENTLY lower the loudspeaker onto its rear feet/outriggers and slowly rock the speaker forward onto all four spikes.
7. Remove protective cover from the loudspeaker.
8. Use the trim removal tool to safely pry the fascia plate off the speaker and remove the protective driver cover.
Maintenance Notes:
During shipping, high frequency vibrations ‘ could’ cause bolts to loosen in the shown locations. Check they are tight – but DO NOT overtighten.
Setup Guide
To obtain the best we suggest that great care is taken in the set-up routine. Your speakers are manufactured to incredibly high tolerances and as such benefit by the same care in setup.
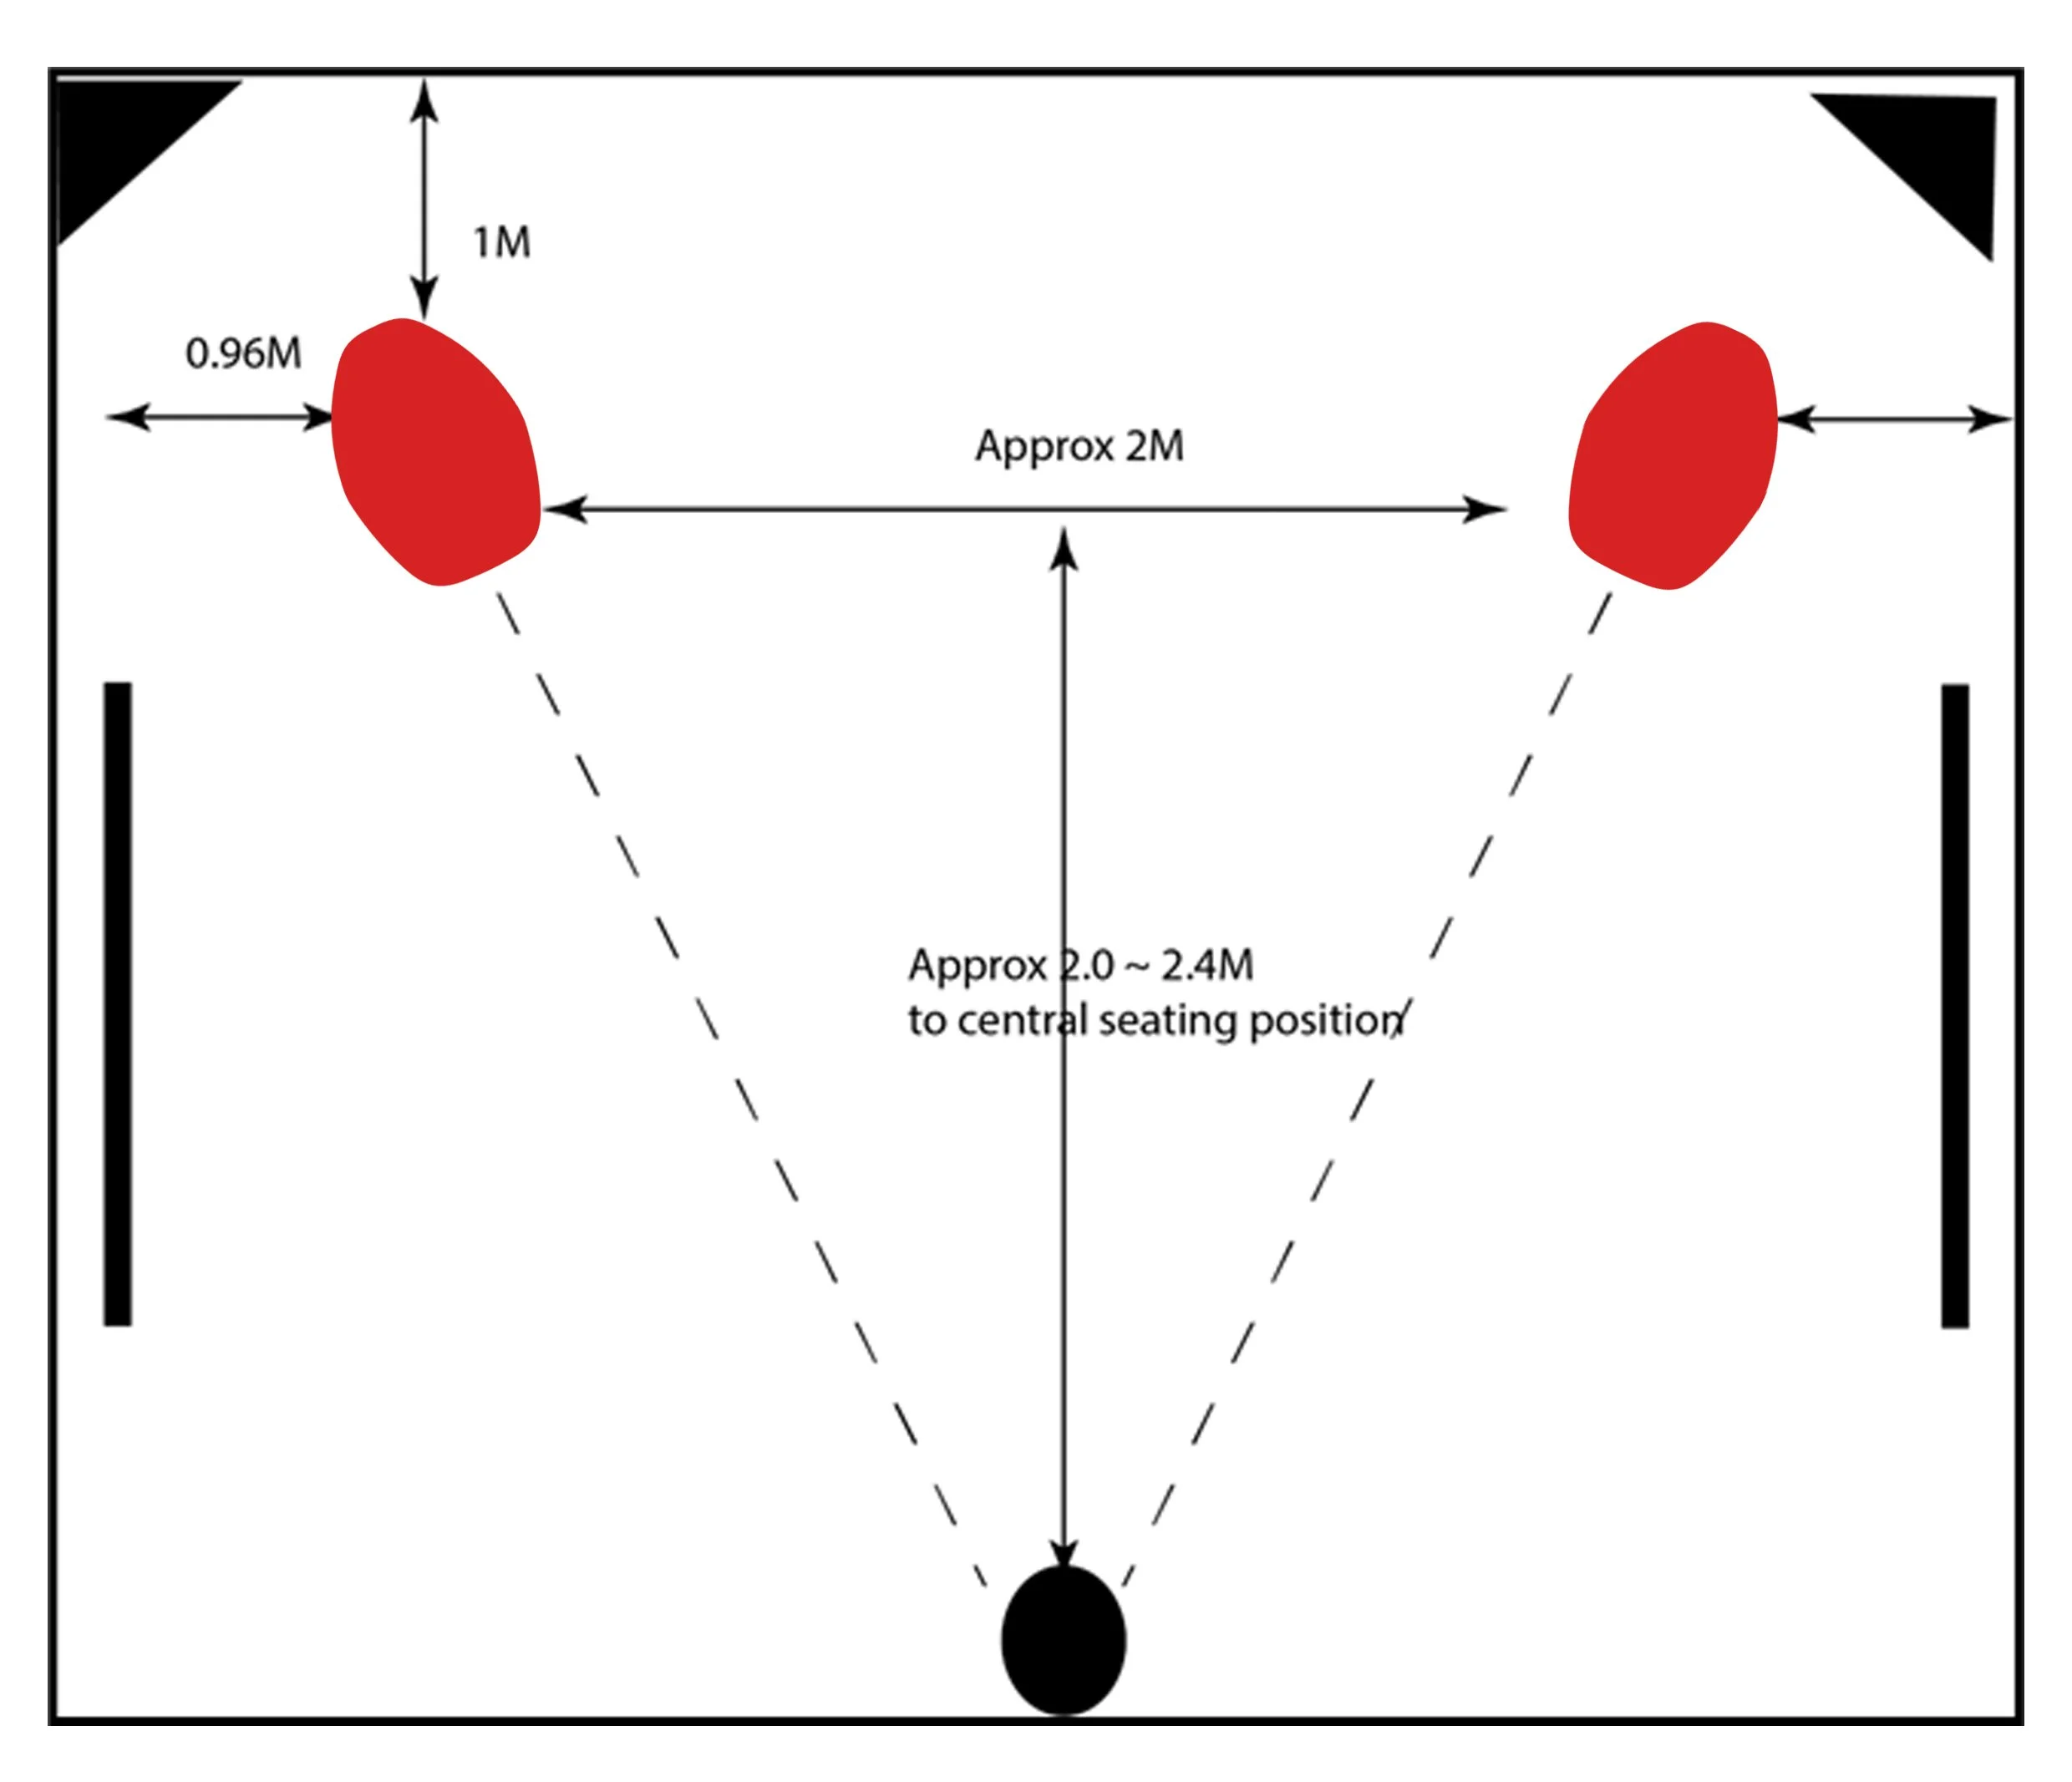
Please use the tools and gloves supplied to maximise success:
1. Start by placing a line at approximately 1m from the back wall, decorators masking tape is useful for this.
2. Place a line at right angles between 0.75 ~0.96m from the side walls. This distance can be extended as required to achieve close to an equilateral triangle for the listening position
3. Using the rear tape line place the bases on the floor pointing at the listening position. Directing the speakers directly at the individual user will give a tight focused central image. Many users prefer a slightly bigger soundstage and this is achieved by pointing the speakers further apart and not directly pointing at a sing focused user.
Levelling the bases:
4. There are 4 adjustable spikes on the bases. Take care when handling.
5. Start by levelling in both planes, left and right/back and front using just 3 of the spikes. Press down hard on the bases to settle them in place.
6. Check again and when satisfied they are level lock the spikes in place by rotating the locking ring clockwise until tight against the base plate.
7. Check again the base is still level.
8. Next wind down the remaining spikes until you feel a small tension where the spike is in contact with the floor. Lock the spikes in place as above.
Connect up the speakers to your system:
Ensure the polarity of the speakers is correct, RED + / White -
We recommend playing music for a number of hours to let the system settle before attempting to make a final setup for your installation. The speakers will sound great immediately from the box but around 100hrs will benefit the speakers and allow them to run in.
After 24hrs please check the levelling of the speakers as they will settle down on to the floor overnight. We cannot stress enough that to get the full potential of your speakers it is necessary to be as precise as possible with the set-up procedure.
Should you wish to re-position the speakers – ensure two people are available to move them to the position you require.
When the system has run-in and positioning is correct the micro detail and high frequency energy will come into sharp focus and be highly energetic getting you as close as possible to the live musical event. Micro detail and dynamics take on a 3D placement in time and space.
The “air” around the music which give spatial and venue clues should be apparent.
We highly recommend working with your dealer/installer (or direct with NODE) to ensure the best sound is achieved. Power and interconnect cables make a large difference to the sound of your system.